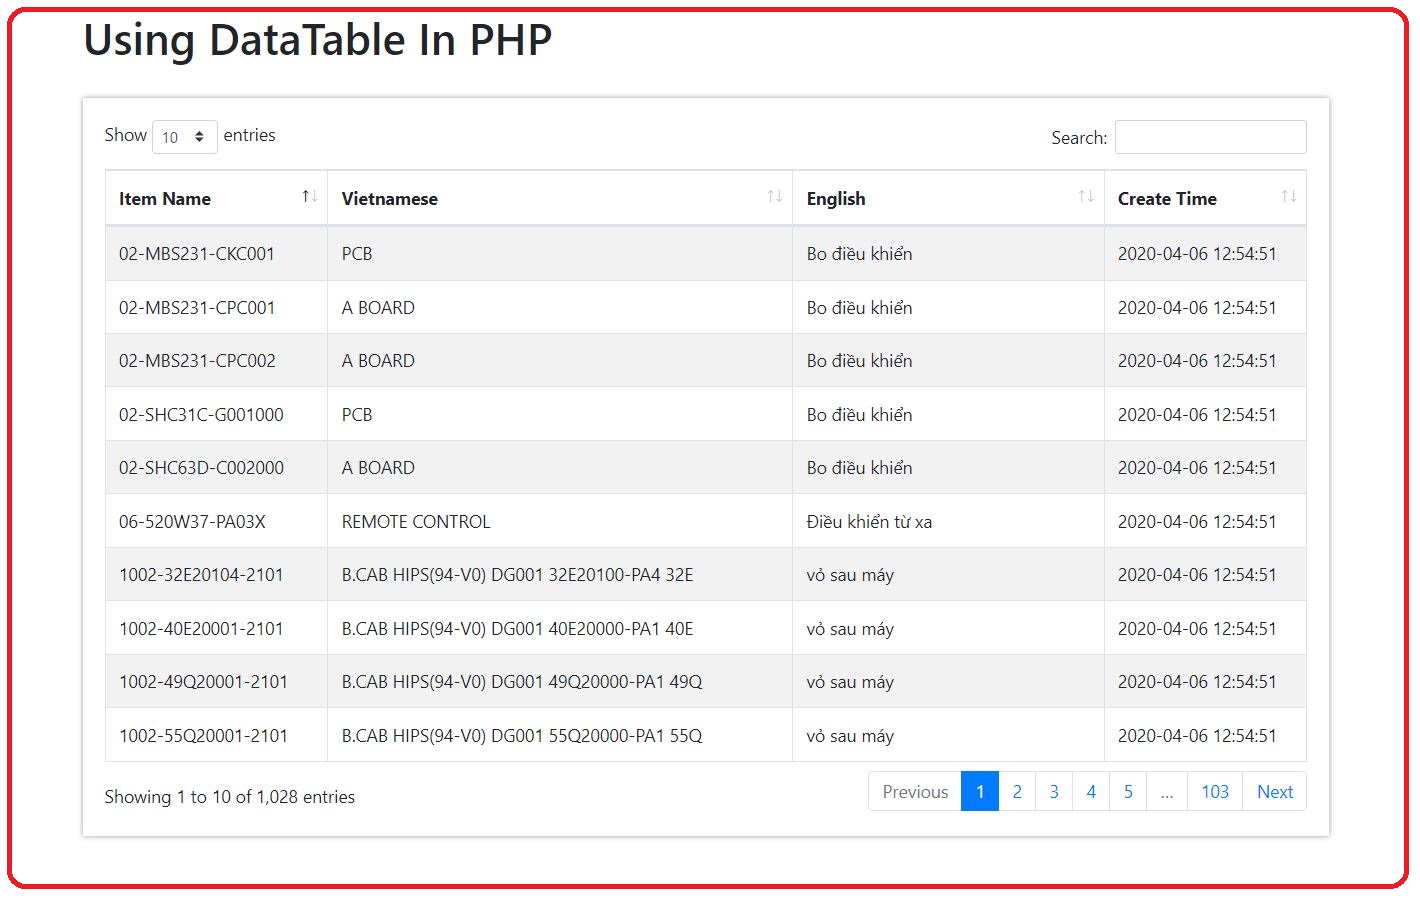
Xin chào các bạn! Trong bài hướng dẫn này chúng ta sẽ sử dụng plugin Datatable jQuery với PHP, MySQL và cách sử dụng Plugin này với Boostrap 4. Trong bài này chúng ta sẽ hiển thị dữ liệu bảng trong MySQL thành kiểu DataTable với thư viện Boostrap 4.
DataTable là một plugin jQuery và nó là công cụ rất hữu hiệu để hiển thị dữ liệu ra bảng trong HMTL. Lợi ích lớn nhất của việc sử dụng plugin này vào dự án là nó giúp chúng ta giảm rất nhiều phía server, sử dụng ít tài nguyên, giảm thiểu khả năng chiếm dụng băng thông, tăng tốc độ load trang web. Với plugin có sẵn này, khi dữ liệu của chúng ta đã sẵn sàng thì chỉ cần vài thao tác kích hoạt và khai báo là đã sử dụng được.
Tạo file index.php
Tạo thư mục chứa dự án, sau đó mở trình soạn thảo code lên. Tạo mới file với tên index.php và lưu vào dự án vừa tạo. Chép đoạn code mẫu sau đây vào file index.php. Nhớ lưu lại dữ liệu mới chép vào nhé. Chạy thử dự án với đường dẫn trên localhost như sau: http://localhost/tên dự án đã tạo/Lưu ý: tên dự án tạo không được để dấu, không được có khoảng trắng để tránh xảy ra lỗi vặt.
index.php
<!DOCTYPE html>
<html>
<head>
    <title>Using Datatable In PHP</title>
    <meta charset="utf-8">
</head>
<body>
    <div class="container-fluid">
	<div class="row">
	    <div class="col-sm-2">
		<div class="gg-ads" style="margin-top:145px;"></div>
	    </div>
	    <div class="col-sm-8">
	        <br />
	        <h1>Using Plugin DataTable jQuery in PHP</h1><br />
		<div class="table-responsive">
		    <table id="dataid" class="table table-striped table-bordered" style="width: 100%;">
			<thead>
			    <tr>
			        <th>Item Name</th>
			        <th>Vietnamese</th>
			        <th>English</th>
			        <th>Create Time</th>
			    </tr>
			</thead>
			<tbody>
			    <tr>
			        <td>AAAAA</td>
			        <td>BBBBB</td>
			        <td>CCCCC</td>
			        <td>DDDDD</td>
			    </tr>
			</tbody>
		    </table>
		</div>
	    </div>
	    <div class="col-sm-2"></div>
	</div>
    </div>
</body>
</html>
<head>
    <title>Using Datatable In PHP</title>
    <meta charset="utf-8">
    <meta name="viewport" content="width=device-width, initial-scale=1">
    <link rel="stylesheet" type="text/css" href="https://cdnjs.cloudflare.com/ajax/libs/twitter-bootstrap/4.5.2/css/bootstrap.css">
    <link rel="stylesheet" type="text/css" href="https://cdn.datatables.net/1.11.0/css/dataTables.bootstrap4.min.css">

    <script src="https://code.jquery.com/jquery-3.5.1.js"></script>
    <script src="https://cdn.datatables.net/1.11.0/js/jquery.dataTables.min.js"></script>
    <script src="https://cdn.datatables.net/1.11.0/js/dataTables.bootstrap4.min.js"></script>
	<style>
	    .table-responsive{
	        box-shadow: 0px 0px 5px #999;
	        padding: 20px;

	        /* option for you */
	        /*height: 680px;
	        overflow-y: scroll;*/
	}
	</style>
</head>
Tạo Database và Import Table
Bước tiếp theo chúng ta truy cập vào http://localhost/phpmyadmin/ tạo mới một database và import bảng vào database vừa tạo.Kết nối và truy vấn dữ liệu trong Database
Để kết nối thành công đến cơ sở dữ liệu, các bạn cần tìm hiểu cách sử dung hàm mysqli_connect($host, $user, $password, $database, $port, $socket). Trong đó:$host: là địa chỉ host của bạn, thông thường là localhost luôn
$user: là tên đăng nhập vào database
$password: là mật khẩu kết nối vào database
$database: Tên database bạn chọn để xử lý
$port: Cổng kêt nối, không bắt buộc
$socket: Phương thức socket kết nối, không bắt buộc
Sau đó là cách truy vấn đến bảng dữ liệu trên database, và cách hiển thị dữ liệu đã truy vấn được ra trang index.php.
<tbody>
<?php
    //connect to mysql
    $conn = mysqli_connect("localhost", "root", "", "datatablephp") or die("Connect fail!");
    mysqli_query($conn,"SET NAMES 'utf8'");

    //fetch data from mysql
    $sql = "SELECT * FROM `itemlist` ORDER BY `id` DESC";
    $query = mysqli_query($conn,$sql);
    while ($row = mysqli_fetch_assoc($query))
    {
?>
    <tr>
	<td><?php echo $row['item_name'] ?></td>
	<td><?php echo $row['name_vn'] ?></td>
	<td><?php echo $row['name_en'] ?></td>
	<td><?php echo $row['created_at'] ?></td>
    </tr>
<?php
    } //end while
?>
</tbody>
Chuyển table thành DataTable
Kích hoạt bảng dữ liệu đã hiển thị trên trang index.php thành dạng DataTable. Lưu ý là bảng dữ liệu phải có một id, trong dự án này bảng dữ liệu được định danh id là dataid.<script>
$(document).ready(function() {
var datatablephp = $('#dataid').DataTable();
});
</script>
Full Souce Code
<!DOCTYPE html>
<html>
<head>
<title>Using Datatable In PHP</title>
<meta charset="utf-8">
<meta name="viewport" content="width=device-width, initial-scale=1">
<link rel="stylesheet" type="text/css" href="https://cdnjs.cloudflare.com/ajax/libs/twitter-bootstrap/4.5.2/css/bootstrap.css">
<link rel="stylesheet" type="text/css" href="https://cdn.datatables.net/1.11.0/css/dataTables.bootstrap4.min.css">
<script src="https://code.jquery.com/jquery-3.5.1.js"></script>
<script src="https://cdn.datatables.net/1.11.0/js/jquery.dataTables.min.js"></script>
<script src="https://cdn.datatables.net/1.11.0/js/dataTables.bootstrap4.min.js"></script>
<style>
.table-responsive{
box-shadow: 0px 0px 5px #999;
padding: 20px;
/* option for you */
/*height: 680px;
overflow-y: scroll;*/
}
</style>
</head>
<body>
<div class="container-fluid">
<div class="row">
<div class="col-sm-2"></div>
<div class="col-sm-8">
<br />
<h1>Using DataTable In PHP</h1><br />
<div class="table-responsive">
<table id="dataid" class="table table-striped table-bordered" style="width: 100%;">
<thead>
<tr>
<th>Item Name</th>
<th>Vietnamese</th>
<th>English</th>
<th>Create Time</th>
</tr>
</thead>
<tbody>
<?php
//connect to mysql
$conn = mysqli_connect("localhost", "root", "", "datatablephp") or die("Connect fail!");
mysqli_query($conn,"SET NAMES 'utf8'");
//fetch data from mysql
$sql = "SELECT * FROM `itemlist` ORDER BY `id` DESC";
$query = mysqli_query($conn,$sql);
while ($row = mysqli_fetch_assoc($query))
{
?>
<tr>
<td><?php echo $row['item_name'] ?></td>
<td><?php echo $row['name_vn'] ?></td>
<td><?php echo $row['name_en'] ?></td>
<td><?php echo $row['created_at'] ?></td>
</tr>
<?php
} //end while
?>
</tbody>
</table>
</div>
</div>
<div class="col-sm-2"></div>
</div>
</div>
</body>
</html>
<script>
    $(document).ready(function() {
        var datatablephp = $('#dataid').DataTable();
    });
</script>
Nếu bạn muốn lấy nguồn hoàn chỉnh với tệp *.sql, xin vui lòng ghi địa chỉ email của bạn vào phần nhận xét. Chúng tôi sẽ gửi cho bạn bộ nguồn hoàn chỉnh theo địa chỉ email của bạn.


No comments: